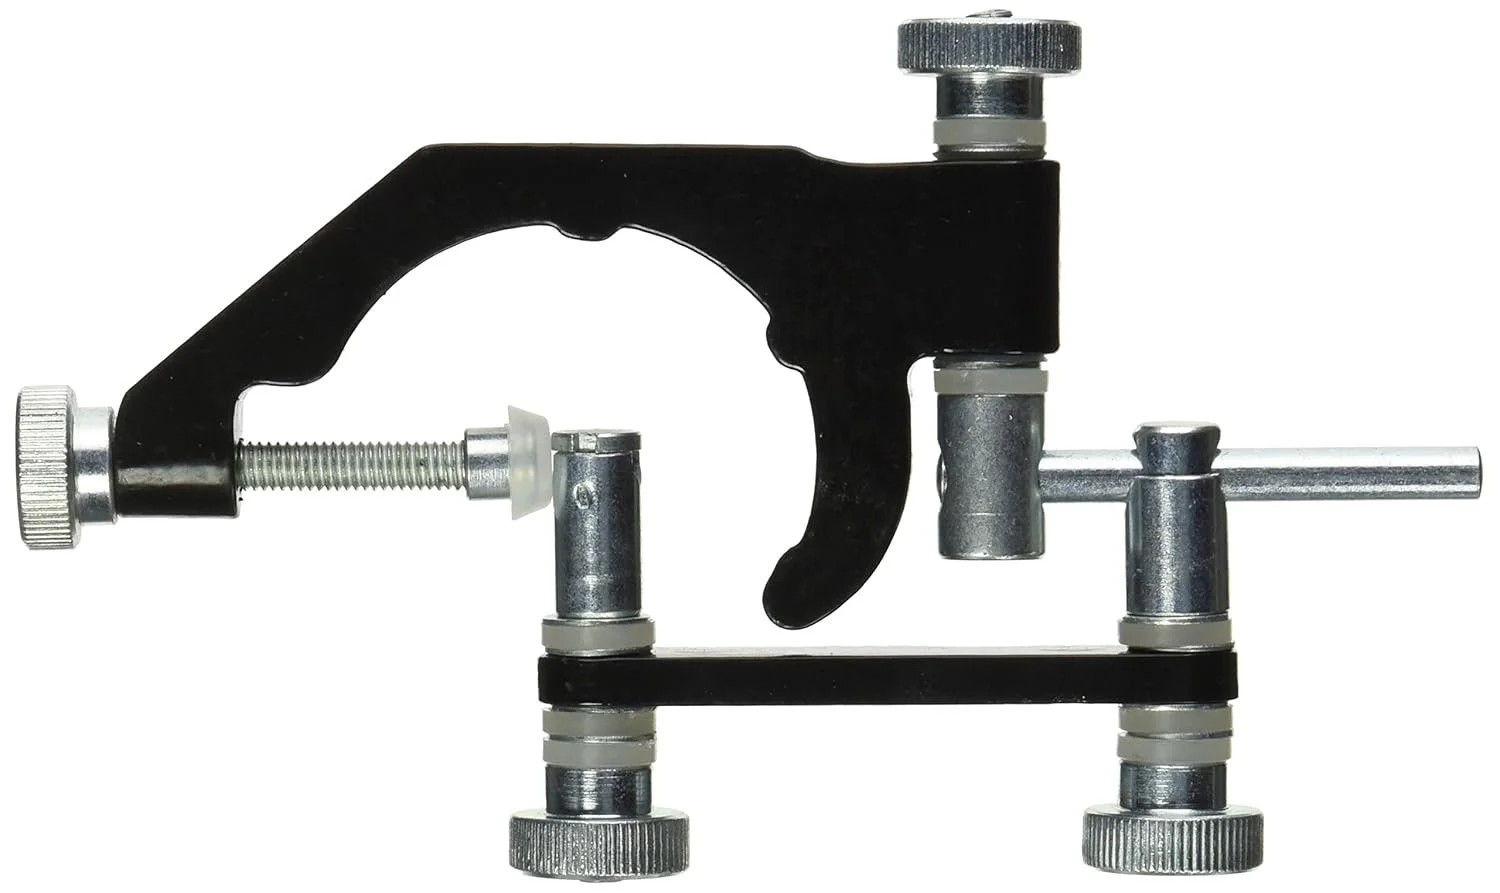
Image 1 of 3
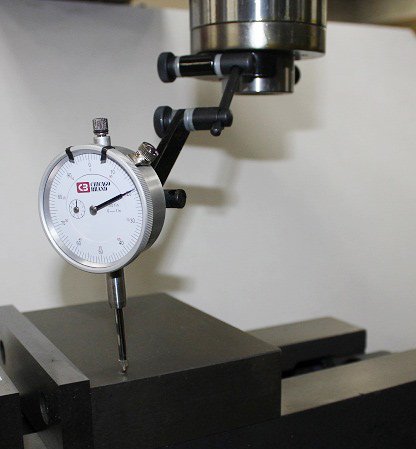
 Image 2 of 3
 Image 3 of 3
-
Mount the Co-Ax Indicator:
Secure the coaxial indicator in the spindle of your machine. Typically, it’s held in a collet or chuck. Ensure it’s firmly attached and the spindle is stationary at this point.
Select the Appropriate Probe:
Co-ax indicators come with different probes (straight, curved, or angled) depending on the feature you’re aligning (e.g., an internal bore or external surface). Attach the probe that best suits your workpiece.
Position the Indicator:
Lower the spindle so the probe tip is close to the surface you want to align (e.g., inside a bore or around a boss). The probe should be able to sweep the surface as the spindle rotates.
Set the Spindle Speed:
Turn on the spindle at a low speed (usually 100-300 RPM, depending on the indicator’s specifications). The co-ax indicator works by rotating the probe, which causes the dial needle to move based on eccentricity.
Observe the Dial:
As the spindle rotates, watch the needle on the indicator’s dial. The needle will swing back and forth if the spindle axis is not aligned with the workpiece feature. The goal is to minimize this swing.
Adjust the Ascertain Center:
Use the machine’s X and Y handwheels (or digital readouts if equipped) to move the table or spindle until the needle swing is minimized. When the needle remains nearly stationary (minimal deflection), the spindle is centered with the workpiece feature.
Verify Alignment:
Stop the spindle and double-check by rotating it manually (if possible) to ensure the probe stays in consistent contact with the surface. Repeat adjustments if necessary.
Lock and Proceed:
Once aligned, lock the table or spindle in place (if applicable) and proceed with your machining operation.